The First 4 Things to Cook in Your Instant Pot
Here are The First 4 Things to Cook in Your Instant Pot, in succession, to be successful in using your Instant Pot right off the bat.
This sequence of recipes will help you get familiar with and build confidence with this handy small appliance.

The First 4 Things to Cook in Your Instant Pot… in Order!
Your First Instant Pot Recipes: Pass or Fail?
I’ve discovered that the reason most of us purchase an Instant Pot (or any brand of electric pressure cooker) is because we long to enjoy a big ole pot roast with all the fixin’s… just like Grandma made.
So, we jump out there and try to cook that roast in our Instant Pot first thing, only to be disappointed with the outcome… our roast turns out like a rubber ball! Such a bummer.
Save this Recipe
Enter your email address and we will send you this recipe to your mailbox for easy reference! Plus, we will send you our latest recipes every week!
Sadly, because this disappointment causes total disillusionment with Instant Pot cooking, we want to quit, and often do. This is such a tragedy and one that can be completely avoided by following a different and easier path.
Gaining Success and Confidence with Your Instant Pot
Preparing the recipes below in the order laid out helps ensure your success. Each recipe builds on the previous one; the more you conquer, the more confidence you gain!
Along the way, you’ll get to experience some delicious foods that give the incentive you need to continue using and learning about this awesome small appliance workhorse….the Instant Pot.
Recipe #1: Water!
Cooking water in your Instant Pot as soon as you get it out of the box is a must…..for two reasons:
- It lets you quickly learn and experience just how your pot works, exactly.
- If you burn water (as opposed to dinner), it’s no biggie!
Cooking Water in Your Instant Pot Let’s You Learn How it Operates –
Place a couple of cups of water into your Instant Pot, locking the lid into place. Check the pressure release knob to be sure it’s set to the SEALING position.
Now, use the Manual button on your Instant Pot display to choose High Pressure for 1-2 minutes of cooking time (or whatever amount of time you feel like since you’re just cooking water!).
As your Instant Pot works to build up pressure inside, watch the valve stem in the back (near the pressure release knob). At the moment the Instant Pot pot becomes fully pressurized, the valve stem will pop up as an indicator.
Once your pot is pressurized, you will see that you cannot even begin to unlock or remove the lid – such a great safety feature.
Now it’s time to perform your first Quick Release of pressure. Carefully turn the pressure release knob to the VENTING position. Be ready – when steam and pressure escape it can be rather startling at first!
When all the pressure is removed from the pot, you will immediately see and hear the valve stem drop, now indicating the pressure is gone and you can carefully unlock and remove the lid.
You’ve done it – YOU COOKED WATER! (Happy Dance)
Recipe #2: Easy Instant Pot Hard-Boiled Eggs
You will love how quickly and easily hard-boiled eggs cook in your instant pot!
How to Make Hard-Boiled Eggs in Your Instant Pot
- Add 1 cup water to the Instant Pot, along with a trivet; place the eggs on top of the trivet, then lock the Instant Pot lid into place.
- Choosing the High Pressure setting, set the Instant Pot timer for 5 minutes, bringing it to full pressure. When the timer sounds, perform a quick release, removing all the pressure from the Instant Pot.
- Carefully unlock and remove the Instant Pot lid, then empty the contents into a very large bowl of ice water, making certain the eggs are submerged.
- After a few minutes, remove the shells from each egg, keeping them submerged beneath the cold water as you do so. Voila!

Easy Instant Pot Hard-boiled Eggs
Ingredients
- 1 cup water
- 12-18 eggs
Instructions
- Place one cup of water into the Instant Pot; add the trivet to the bottom of pot. Stack the eggs on top of each other on the trivet.
- Lock the Instant Pot lid into place, choosing High Pressure for 6 minutes, bringing the Instant Pot to full pressure.
- When the timer sounds, perform a quick release to remove all the pressure from the Instant Pot.
- Immediately pour the entire contents of the Instant Pot into a large bowl of ice water.
- After 2-3 minutes of letting the eggs chill a bit, remove the eggs, one at a time from the bowl of water, cracking the shells of each egg on the counter. Re-submerge each egg beneath the cold water in the bowl, gently peeling and pulling all the shells from each egg with your fingers.
Nutrition
Your hard-boiled eggs will taste great in these delicious recipes:
Sarah Jane’s Spicy Deviled Eggs – Sarah Jane’s spicy jalapeno mustard gives these eggs just the kick in the pants they’ve needed.
Over-Loaded Deviled Eggs – Make your deviled eggs heavenly with bacon, sharp cheddar cheese, and sour cream… need I say more?
Recipe #3: Homemade Applesauce
Getting the hang of it now? Let’s try applesauce! If you have an immersion blender or food processor, you don’t even need to peel your apples before pressure cooking them! Just process the cooked apples until smooth and enjoy the added nutrition.

Awesome Instant Pot Applesauce
Ingredients
- 8 medium apples, quartered and seeds removed, skins on, if preferred
- 1 teaspoon cinnamon, or 1 cinnamon sticks
- 1/2 cup water, apple juice, or cider
- 1/3 cup granulated sugar, you may need to adjust this depending on the type of apples you use
- 1 teaspoon kosher salt (or 1/2 tsp. table salt)
- 1 teaspoon vanilla extract, optional
Instructions
- Place the water or juice into the Instant Pot; add the cinnamon, sugar, salt, and apples. Lock the lid into place choosing the High Pressure setting for 5 minutes; bring the Instant Pot up to full pressure.8 medium apples, quartered and seeds removed, skins on, if preferred, 1 teaspoon cinnamon, or 1 cinnamon sticks, 1/2 cup water, apple juice, or cider, 1/3 cup granulated sugar, you may need to adjust this depending on the type of apples you use, 1 teaspoon kosher salt (or 1/2 tsp. table salt)
- When the timer sounds, perform a quick release to remove all the pressure from the Instant Pot; unlock and carefully remove the lid.
- Using an immersion blender, blend the contents of the Instant Pot until smooth. *If you don’t have an immersion blender, a food processor works great too. Or, if you prefer not to use either of these kitchen appliances, peel your apples before pressure cooking them. This way you can use a potato masher or mixer to process your cooked apples until smooth.
- When applesauce has cooled a bit, stir in the vanilla. Store the applesauce in the fridge for up to 4 days or in the freezer for up to 8-12 months.1 teaspoon vanilla extract, optional
- If canning the applesauce after it's cooked, place it immediately into hot pint or quart jars. Add the hot canning lids and rings, tightly screwing on the ring. Place the jars of applesauce into a water bath and process for 20 minutes. Cool the jars of apple sauce, making sure the lids seal securely.
Nutrition

Recipe #4: Little Smokie Mac and Cheese
This recipe is cheesy and creamy…..straight-up comfort food! What’s the best thing about making pasta in the Instant Pot? It only takes 5 minutes and you don’t have to drain the pasta after it’s cooked! Simply stir the remaining ingredients into the cooked pasta and it’s ready to eat.

Instant Pot Little Smokie Mac and Cheese
Ingredients
- 3 cups rotini pasta, or your favorite pasta of choice
- 3 cups chicken or vegetable broth
- 2 cups shredded sharp cheddar (or any cheddar cheese you prefer)
- 10 3/4 oz. can Campbell's Condensed Cheddar Cheese Soup,, may substitute 10 oz. cubed Velveeta cheese
- 1 egg
- 1/2 cups sour cream
- 1 Tbs. spicy brown mustard
- 1/2 cup evaporated milk
- 1 lb. Little Smokie all-beef sausages, browned off in a bit of oil first (may also substitute slices of kielbasa sausage that have been browned off a bit)
- kosher salt and freshly ground black pepper, to taste
- your favorite bbq sauce, for drizzling over the top of each serving, if desired
Instructions
Instant Pot Cooking Method
- Place the broth into the Instant Pot; use the saute setting to get the broth boiling, then stir in the pasta. Lock the Instant Pot lid into place. Using the manual button, choose High Pressure for 5 minutes, bringing the Instant Pot to full pressure.
- When the timer sounds, use a quick release to remove all pressure from the Instant Pot. Carefully remove the lid and give the pasta a quick stir; you will notice that the pasta has absorbed all the broth (or nearly all of it), so therer's no need to drain it.
- Add the beaten egg to the sour cream, then stir this mixture into the hot pasta. Add the cheddar cheese soup, shredded cheddar cheese, spicy brown mustard and the evaporated milk, mixing to combine all the ingredients together. To serve, place the mac and cheese into serving bowls; drizzle with your favorite bbq sauce, if desired, and enjoy.
Slow Cooker Cooking Method
- Combine macaroni and chicken broth in a large pot; bring to a boil over medium high heat and cook for 5 minutes. Do not drain water from macaroni! Stir in the cheese, soup, and sour cream/egg mixture, and spicy brown mustard; combine well, then fold in kielbasa; season macaroni and cheese to taste with salt and pepper. Place macaroni into a pre-heated slow cooker and cook on low for 2-3 hours, until the pasta has absorbed most of the extra liquid the pasta is tender. To serve, place the mac and cheese into serving bowls; drizzle with your favorite bbq sauce, if desired, and enjoy.
Nutrition
I hope your first 4 recipes are a smashing success. Now that you’ve built up some confidence, it’s time to try a pot roast.
Below is my favorite Instant Pot Roast Beef recipe – Just 2 ingredients needed!

Easy Instant Pot Italian Beef Pot Roast
Ingredients
- 1 chuck roast, approx. 3 lbs.
- 16 oz jar sliced pepperoncini peppers, with juices (If you prefer something less spicy, use a jar of pickled banana pepper rings instead)
Instructions
- Pour half of the jar of pepperoncini and their juices into the Instant Pot; add the roast to the pot, then pour the remaining pepperonincini and juices over the roast.
- Lock the Instant Pot lid into place. Using the high pressure setting, set the timer for 60 minutes, bringing the Instant Pot to full pressure. (Allow 15-20 minutes pressure cooking time for each pound of uncooked roast. If you are cooking the roast from frozen, increase the pressure cooking time to 25-30 minutes per pound of roast, still using the natural release.)
- When the timer sounds, perform a natural release, which allows the pressure in the Instant Pot to naturally come down on it's own. Open the Instant Pot and test the roast – the beef should be very fork-tender.
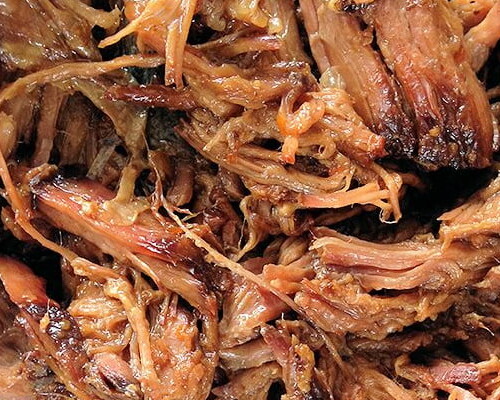
- Remove the beef from the Instant Pot to a cutting board. Using two forks, shred the beef to eat as desired.
Notes
Nutrition
Once you’ve made that delicious pot roast, it’s time to start enjoying the fruits of your labor! A beef roast can go a long way in these delicious dinners:
- Lazy-Butt Beef Subs with Caramelized Onions and BBQ Mayo
- Loaded Skillet Fries with Beef and Bacon
- Roast Beef Wellington Packets
What to Do When Your Instant Pot Won’t Pressurize
Print my FREE Instant Pot/Electric Pressure Cooker Troubleshooting Guide. It’s a simple 6-Step Checklist of the most common pressure cooker problems you’ll face.
Print the guide, then read about each step in more detail here: The Top 6 Reasons Your Instant Pot Won’t Pressurize… and What To Do About It
Free Printable Quick Cooking Chart

Other Instant Pot Resources You Will Find Helpful:
- The Best Instant Pot Tips for Beginners
- How to Make Your Instant Pot Pressurize Faster
- 12 Ways an Instant Pot Saves You Time in the Kitchen
- The 7 Solid Reasons You Need an Instant Pot
- Instant Pot Tools and Accessories That Will Change Your Life
- The Top 6 Reasons Your Instant Pot Won’t Pressurize and What To Do About It
- How to Cook Frozen Meat in an Instant Pot….Really!
- Your Top Instant Pot Questions…..Answered

