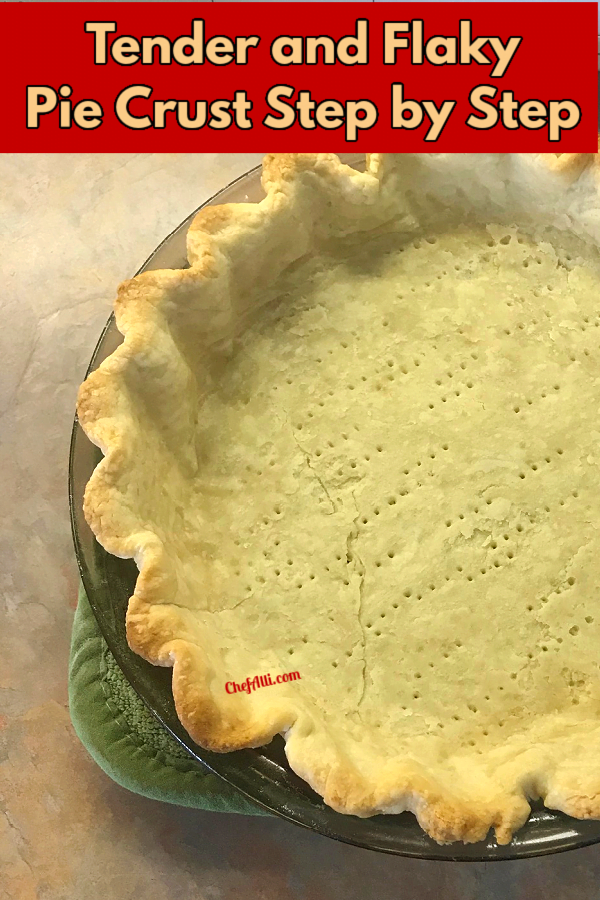
Tender and Flaky Pie Crust – Step by Step
Have you been searching for a very easy pie crust recipe that’s simple to make and work with? With this recipe for Tender and Flaky Pie Crust – Step by Step, you can learn to make pie crust you’ll be so proud of.
Tender and Flaky Pie Crust Recipe
Please Note: We do use referral and affiliate links here for products and services that Chef Alli loves and recommends.
Howdy! Chef Alli Here. Let’s Get You Cookin’….Shall We? ?
I watched both of my Grandmother’s make homemade pie crust quite often as I was growing up. My Grandma Elsie showed me how to make her apple pie and my Grandma Lucille showed me how to make a baked strawberry pie with a lattice top.
Back then, it was common to make your own homemade pie crust but lifestyles back then weren’t quite as hectic and busy as they are today. A homemade pie made with a frozen take-and-bake pie crust is still delicious, so don’t let that worry you. I do that often because I’m sometimes rushed but have promised pie for dessert!
My family loves Chocolate Cream Pie so I make it quite often for them. It’s easy to make since the pie filling is made right in the microwave! Another chocolate pie is Chocolate Butterfinger Pie, thought it doesn’t involved making homemade pie crust.
Save this Recipe
Enter your email address and we will send you this recipe to your mailbox for easy reference! Plus, we will send you our latest recipes every week!
Things to Love About This Recipe –
- You are no longer going to be afraid to make homemade pie crust!
- Everyone is going to drool over the pies you make.
- You can easily and quickly stock your freezer with pie crust dough so it’s ready to grab anytime.
The 6 Ingredients You Will Need to Make Pie Crust Dough
- All-purpose flour
- salt
- sugar
- chilled lard
- chilled butter
- ice water or a combination of water and vodka, if preferred
How to Make Tender and Flaky Pie Crust, Step by Step
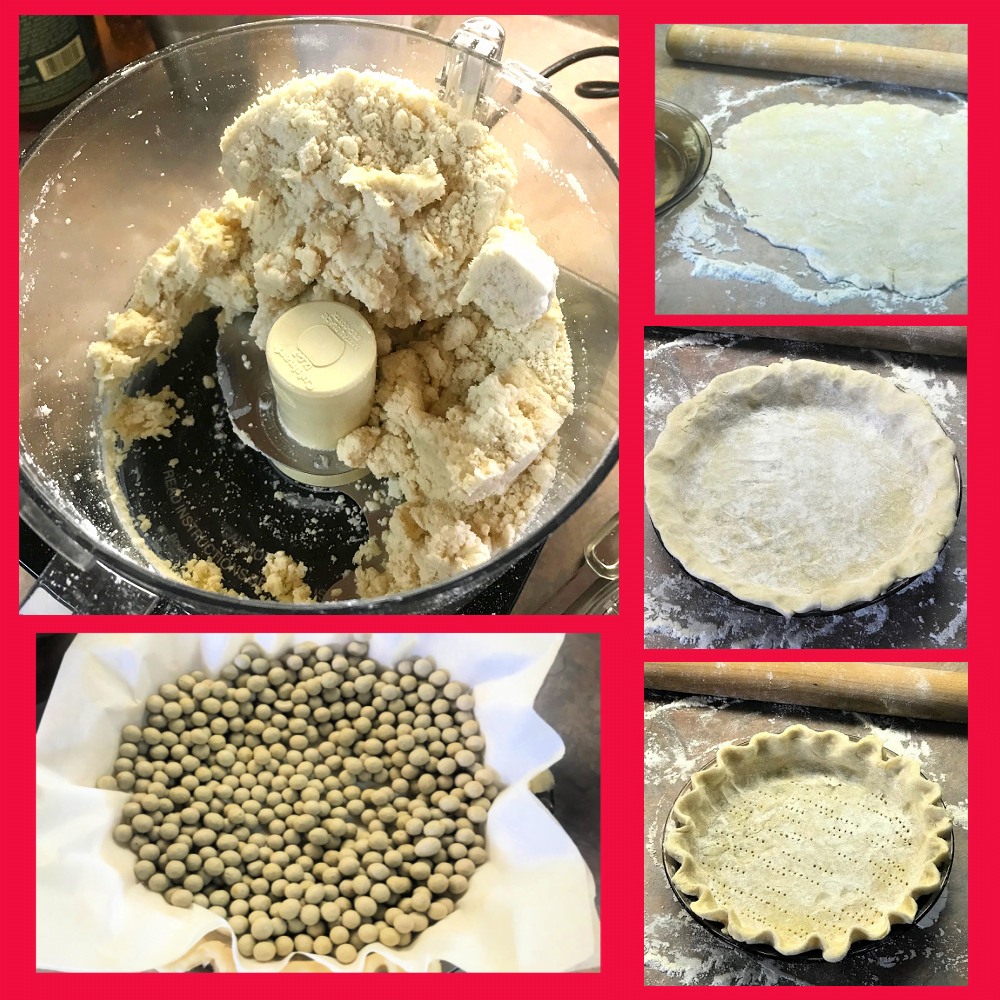
- In a food processor bowl, pulse the flour, salt, and sugar to combine; add the lard and butter, pulsing again until the mixture is a fine meal.
- Drizzle in the liquid, then pulse the ingredients until the dough comes together in a large mass on one side of the bowl.
- Remove the dough to a lightly floured work surface, dividing it in half; wrap each half in plastic wrap, placing both of them into the fridge to chill.
- Once the dough is nicely chilled, you will roll it out on a flour work surface, working from the center of the dough outward.
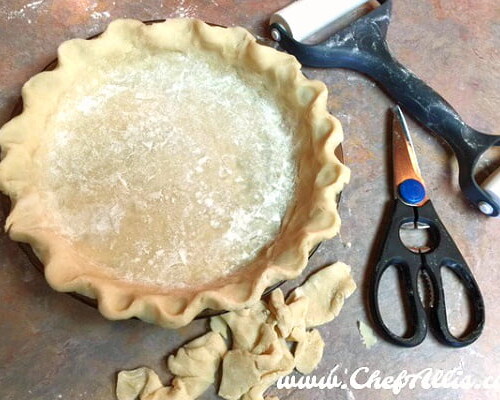
- When it’s the size you need, place the pie dough into the pie plate; trim the dough then fold it at the edge to make a decorative crust. It’s time to bake the pie crust!
**See the recipe instructions below for tips for ROLLING out the dough and placing it into the pie plate, then how to bake the pie crust.
Helpful Recipe Tips for Making and Rolling Out Perfect Pie Crust
- Using vodka as part of the liquid for making pie crust dough is a secret technique that I often use. Because the alcohol in the vodka evaporates quickly, it helps to set the crust, which helps to make it flaky and tender as the baked end result.
- The addition of lard also helps to make a tender and flaky pie crust, but please don’t worry if you do not have this ingredient on hand. You can use all butter to make this crust instead.
- If you’d like to try a pie crust with lard, you can usually find it in a small box in the baking section of your favorite grocer. I portion it out into one-third cup amounts and wrap each one with foil, placing them into my freezer. Then, when I want to make pie crust, they are all ready to go!
- To quickly thaw lard just enough so that it’s still a bit chilled for this recipe, place it onto a plate and use the thawing setting in your microwave for 30 seconds; cut the lard into chunks and proceed as directed.
- Don’t overwork the pie dough as causes it to release the gluten, making for a tough pie crust. Once the pie dough comes together as a large mass on one side of the food processor bowl, stop everything, removing the dough to a floured work surface.
- You can make several batches of this dough (might as well since the food processor is already dirty) and freeze it. That way when you want to whip out a pie, the dough is ready to go.
- Because of the high fat content in the dough, it doesn’t take long for it to thaw.
- Don’t use tons of flour for rolling out the pie crust dough, just enough so that the dough does not stick to the counter surface. If this happens, you won’t be able to lift it from the work surface to your pie plate – what a pain.
- Work quickly when rolling out the dough – it’s much, much easier to work with while it’s slightly chilled. If the dough warms too much, return it to the fridge to chill again and start over.
- Sometimes, when the weather is especially humid like here in Kansas, you will need to use extra flour for rolling out the dough, even slightly working a bit into the dough.
- Rolling out pie dough does take just a little bit of practice, but this is a solid recipe for learning how to do so. If your first pie crust isn’t perfect – don’t worry! This tells your guests that it’s HOMEMADE – what a plus!
- If you don’t have pie weights to use when baking the single bottom crust, instead place dried beans on top of the parchment to weight it down – this works fine!
- After using the beans for pie weights a couple of times, you will need to toss them out.
- Baking the crust first on the lower rack helps to brown the bottom of the crust, making it nice and crisp. Then, moving the pie crust to the mid or upper section of the oven helps it brown on the top crust.
- If you prefer, you can remove the parchment and pie weights, returning the crust to the oven to add more browning to the top of the crust. This should just take 5 minutes or so once the pie weights are removed.
Here’s another way great way to bake a pie crust!
- Preheat the oven to 375 degrees F.
- On a floured work surface, roll out the pastry dough into a large circle; lift the pastry crust from the work surface, placing it into your pie pan.
- Using your finger tips, gently press the pastry crust down into the pan so that the dough is directly laying against the sides of the pan and across the bottom.
- Using your fingers tips once more, press the edges of the dough down along the top edge of the pie pan; use a fork to crimp the edge of the pastry dough all round the outer edge. Using the same fork, prick all over the bottom and sides of the pastry crust.
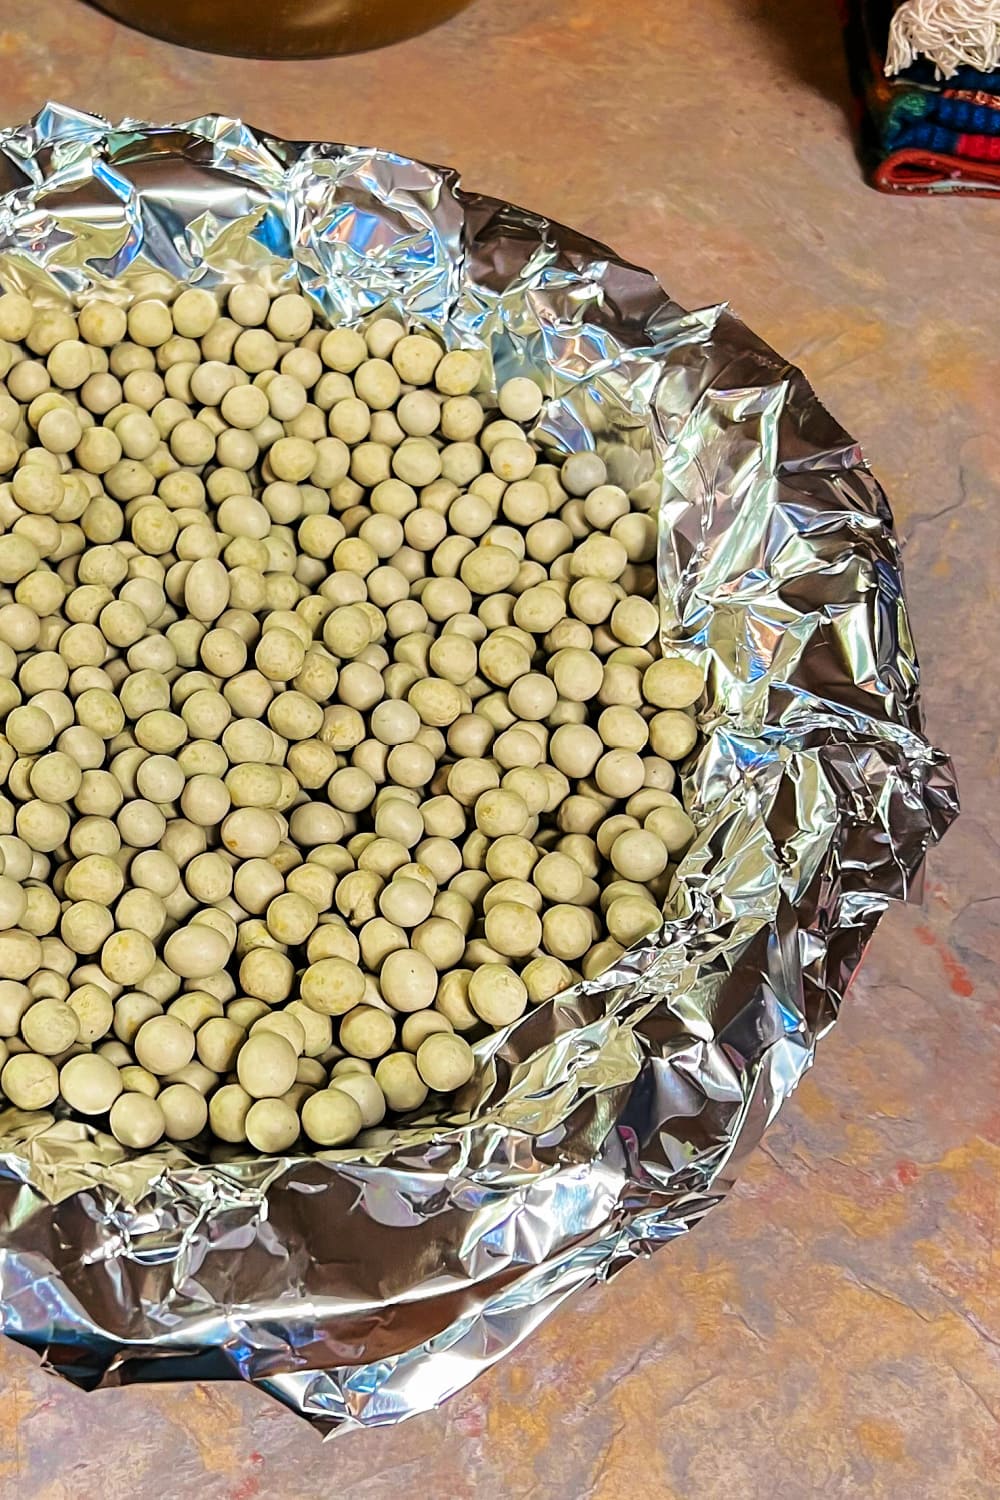
- Cover the pie crust with a large sheet of foil, gently pressing the foil down into the pie pan so that it is laying right against the dough. Be sure the edges of the pie crust are covered with foil all the way around – use an extra sheet of foil if needed.
- Fill the foil-lined pie crust with pie weights, spreading them out into an even layer.
- Place the pie crust into the preheated oven on the lower rack; bake the pie crust for 15 minutes, then remove from the oven.
- Carefully lift the foil and the pie weights from the pie crust, placing everything into the sink or a large glass bowl….watch out – the pie weights are HOT!
- Now, return the pie crust to the oven, placing it on an upper rack. Continue to bake the pie crust for an additional 5-10 minutes, or just until the top of the pie crust is nicely golden brown.
- Remove the pie crust from the oven and let fully cool before adding your cream filling.
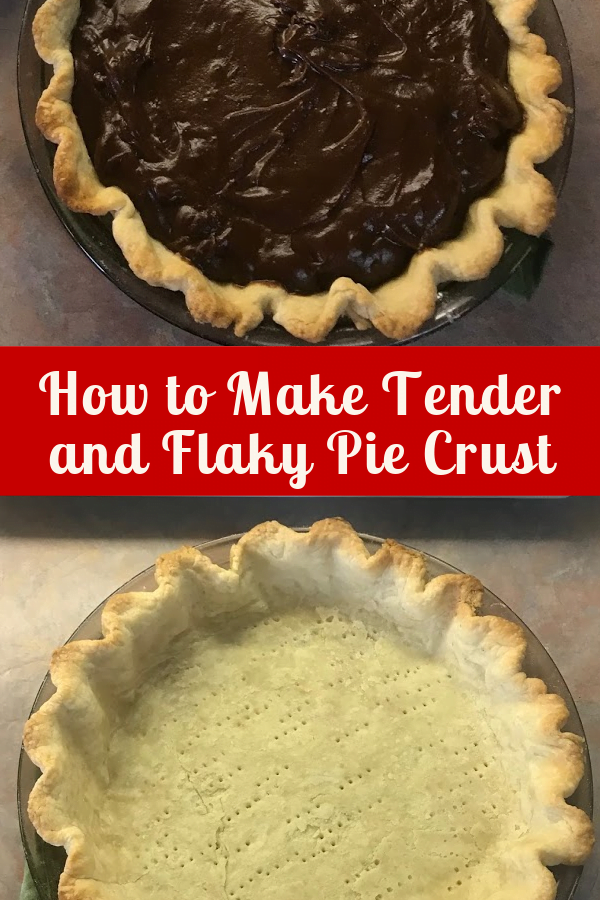
**Be sure to make Chocolate Cream Pie…The Easy Way. It’s the perfectly simple recipe to use when you are first making your own pie crust from scratch.
Other Favorite Treats Your Family Will Enjoy –
- Crumbled Butter-Brickle Ice Cream Dessert
- Ice Cream Brownie Pie
- Ice Cream Sandwich Cake
- Berry Good No-Bake Cake
- Watermelon Dessert Pizza
- No-Bake Chocolate Butterfinger Pie
- Raspberry Lemonade Sangria
- Chocolate Cream Pie….Made the Easy Way
- How to Make a Moist and Tender White Cake….From a Box Mix!
Printable Tender and Flaky Pie Crust – Step by Step Recipe –
Tender and Flaky Pie Crust - Step-by-Step
Ingredients
- 2 1/2 cups all-purpose flour
- 1 tsp. kosher salt or 1/2 tsp. table salt
- 1 Tbs. granulated sugar
- 1/3 cup chilled lard
- 12 Tbs. chilled unsalted butter, cut into 1-inch slices
- 4-6 Tbs. ice water (if preferred, you may substitute vodka for half of the water)
Instructions
- Place the flour, salt, and sugar into the bowl of a food processor bowl; pulse a couple times to combine. Add the lard and 4 Tbs. of butter to the food processor bowl, pulsing until the mixture is a fine meal. Add the remaining butter, pulsing once more just until the flour mixture is pea-size in texture.
- Drizzle the ice water over the flour/butter mixture, pulsing again just until the dough comes together in a large mass on one side of the food processor bowl. Remove pie crust dough to a lighty floured work surface; divide in half.
- Shape each half of the pie crust dough into a disc and wrap tightly in plastic wrap; place the dough into the fridge to chill. Once the dough is chilled throughout, you can use it to roll out into a pie crust. Dough can remain in the fridge for 3-4 days, or in the freezer for up to 6 months when wrapped well. Each disc of dough makes one pie crust.
How to Roll Out the Dough to Make a Bottom Pie Crust for Making Cream Pies
- Preheat the oven to 400 degrees F.
- On a lightly floured work surface, place one disc of chilled pie crust dough. Using your favorite rolling pin, begin to roll out the dough outwards, starting at the center of the disc. Make sure you have enough flour on the work surface so that the dough isn't sticking to the work surface as you are rolling it out into a pie crust. This is critical for being able to easily lift the pie crust into your pie plate.
- Working quickly, continue rolling the dough out until it's about 1/4-inch in thickness; sprinkle some flour on top of the pie crust, the fold the dough in half, quickly lifting it up from the work surface and placing it into your pie plate.
- Unfold the dough, gently using your fingertips to press it down into the pie plate across the bottom and up the sides. Cut any excess dough that is hanging over the sides of the pie plate, leaving about 1/2-inch of dough extending over the edge of the pie plate, all the way around.
- Gently fold the extra 1/2-inch of dough beneath the pie crust edges so that it makes the dough there thicker for forming a decorative crust. Using your fingers, crimp the perimeter of the dough around the edge into a decorative pattern, or use a fork to simply press the dough down again the lip of the pie plate, if that's easier. Crimping the dough around the edge of the pie plate to make the crust will get easier the more pie crusts you make, so don't give up!
- Using a fork, prick the pie crust in the pie plate, all across the bottom and a little way up the sides, as well. At this point, the pie crust can be covered and refrigerated if you are using it at a later time.
- Place a square sheet of parchment paper into the pie crust; top the parchment with pie weights or dried beans to hold the parchment down against the dough. The pie weights are what keeps the pie crust in the exact shape of the pie plate as it bakes. Otherwise, without the pie weights, when the pie crust is baking, it sometimes bubbles up across the bottom or the dough on the sides of the pan may slide down which is very frustrating.
- Place the pie crust into the oven on the bottom rack; bake for 15 minutes. Now move the pie crust to the center rack, continuing to bake for an additional 10-15 minutes, or until the pie crust is golden brown at the edges and on the bottom.
- Remove the pie crust to a cooling rack. When the pie crust and the pie weights have cooled completely, use the parchment paper to lift the beads from the pie crust. Your pie crust is now ready for the cooked cream pie filling to be added. (Such as a chocolate cream pie or lemon meringue pie, etc.)
Notes
- Using vodka as part of the liquid for making pie crust dough is a secret technique that I often use. Because the alcohol in the vodka evaporates quickly, it helps to set the crust, which helps to make it flaky and tender as the baked end result.
- The addition of lard also helps to make a tender and flaky pie crust, but please don’t worry if you do not have this ingredient on hand. You can use all butter to make this crust instead.
- Don’t overwork the pie dough as causes it to release the gluten, making for a tough pie crust. Once the pie dough comes together as a large mass on one side of the food processor bowl, stop everything, removing the dough to a floured work surface.
- You can make several batches of this dough (might as well since the food processor is already dirty) and freeze it. That way when you want to whip out a pie, the dough is ready to go.
- Don’t use tons of flour for rolling out the pie crust dough, just enough so that the dough does not stick to the counter surface. If this happens, you won’t be able to lift it from the work surface to your pie plate – what a pain.
- Work quickly when rolling out the dough – it’s much, much easier to work with while it’s slightly chilled. If
- If you don’t have pie weights to use when baking the single bottom crust, instead place dried beans on top of the parchment to weight it down – this works fine!
- Baking the crust first on the lower rack helps to brown the bottom of the crust, making it nice and crisp. Then, moving the pie crust to the mid or upper section of the oven helps it brown on the top crust.
- If you prefer, you can remove the parchment and pie weights, returning the crust to the oven to add more browning to the top of the crust. This should just take 5 minutes or so once the pie weights are removed.
Nutrition
Thanks for visiting! I hope you return soon for more yummy recipes for your family.
We love hearing from our readers and followers, so leave us a comment if you’d like. If you don’t hear back from us shortly, know that we may not have seen your comment. Feel free to reach out to us by email: ChefAlli@ChefAlli.com.

