Cherry Cheesecake Danish
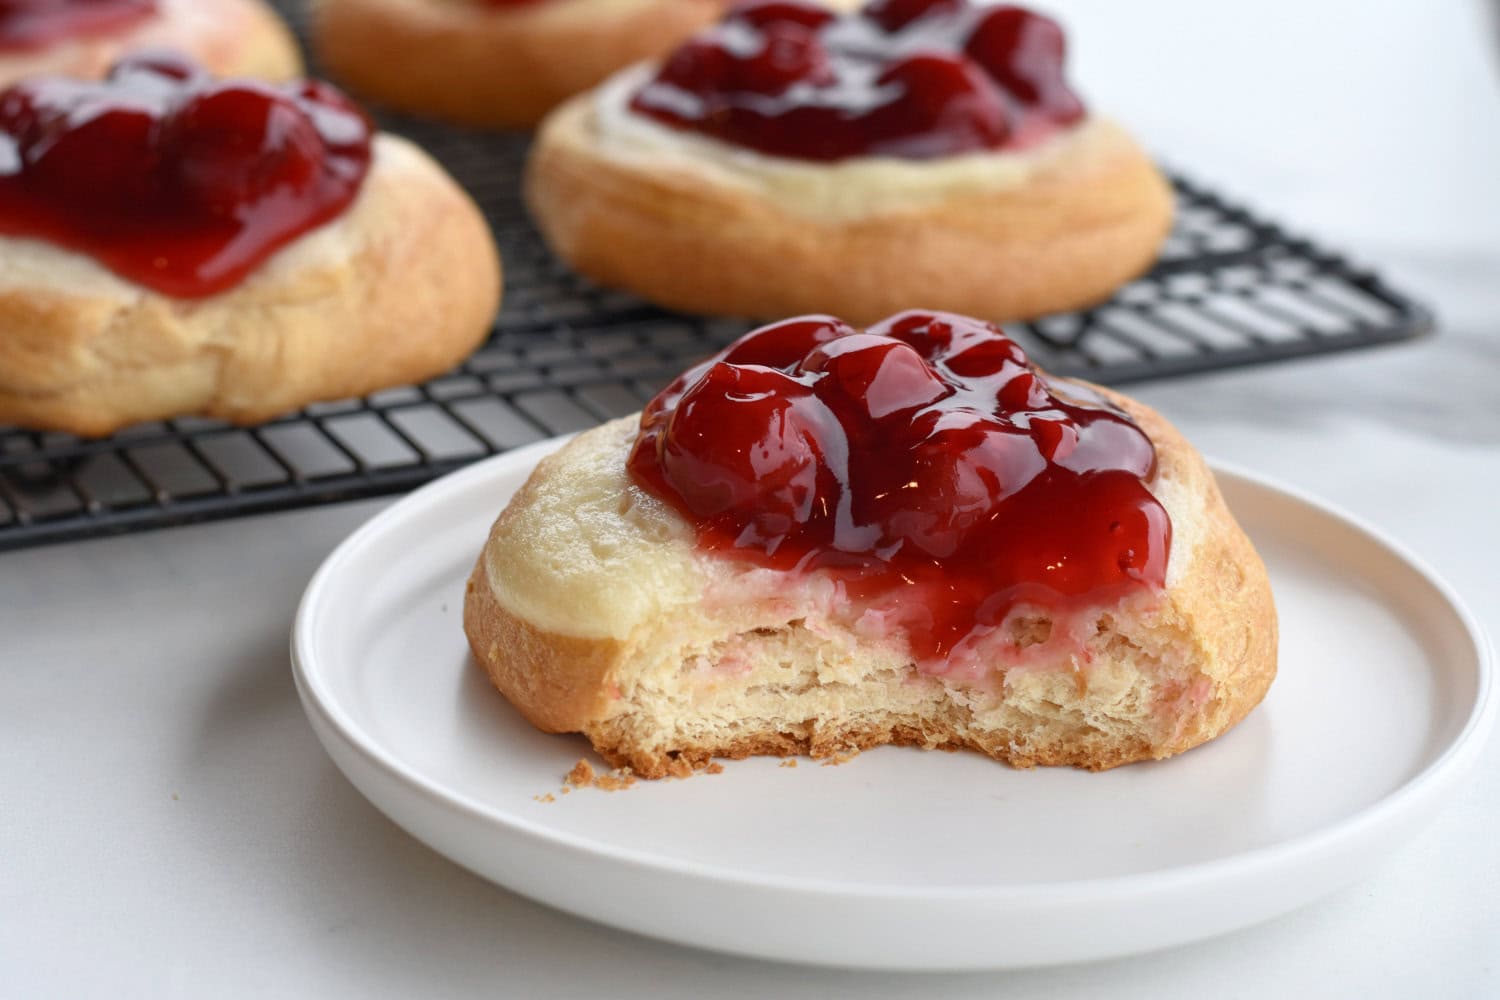
Made with cherry pie filling, cream cheese, and Pillsbury crescent roll dough, this Cherry Cheesecake Danish recipe makes the most tender and sweet pastries.
If you love cherry (and cherry pie filling) as much as we do, you should also try my Cherry Almond Cake or Cherry Coffee Cake.

Cherry Danish
You are just five ingredients away from homemade cherry Danish pastry with cream cheese you can have ready in less than 30 minutes, start to finish.
I find that any pastry made with Pillsbury crescent roll dough bakes up pretty heavenly and is always popular with friends and family.
This recipe can be made 2-3 hours before you want to serve breakfast, doubled, or frozen to bake fresh later. If you prefer, you can also make these pastries into mini Danish.

Ingredients
View the complete recipe card below for exact ingredient amounts and suggested substitution amounts.
- Pillsbury crescent roll dough: Or similar brands, make sure it is an 8-count package.
- Cream cheese: Softened. You can substitute low fat cream cheese if desired…but why? It’s PASTRY!
- Cherry pie filling: I use the Duncan Hines Wilderness brand whenever possible; use your favorite. You can also make this with other fruit pie fillings, such as apple, blueberry, or peach.
- Granulated sugar and vanilla extract: These ingredients sweeten and flavor the cream cheese to make the cheesecake filling.
- All-purpose flour: This is an important ingredient since it acts as a stabilizer in the cream cheese filling, keeping it from spreading too much as the pastries bake.

How to Make Cherry Cream Cheese Danish
View the complete recipe card below for exact ingredient amounts and suggested substitution amounts.
Preheat oven to 350 degrees F.
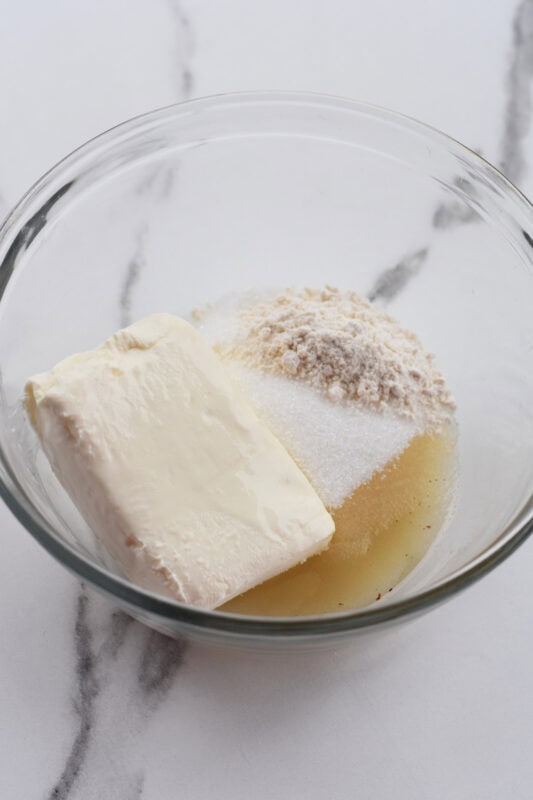
In a medium mixing bowl, prepare the cheesecake filling by combining the softened cream cheese, sugar, flour, and vanilla, stirring until smooth.


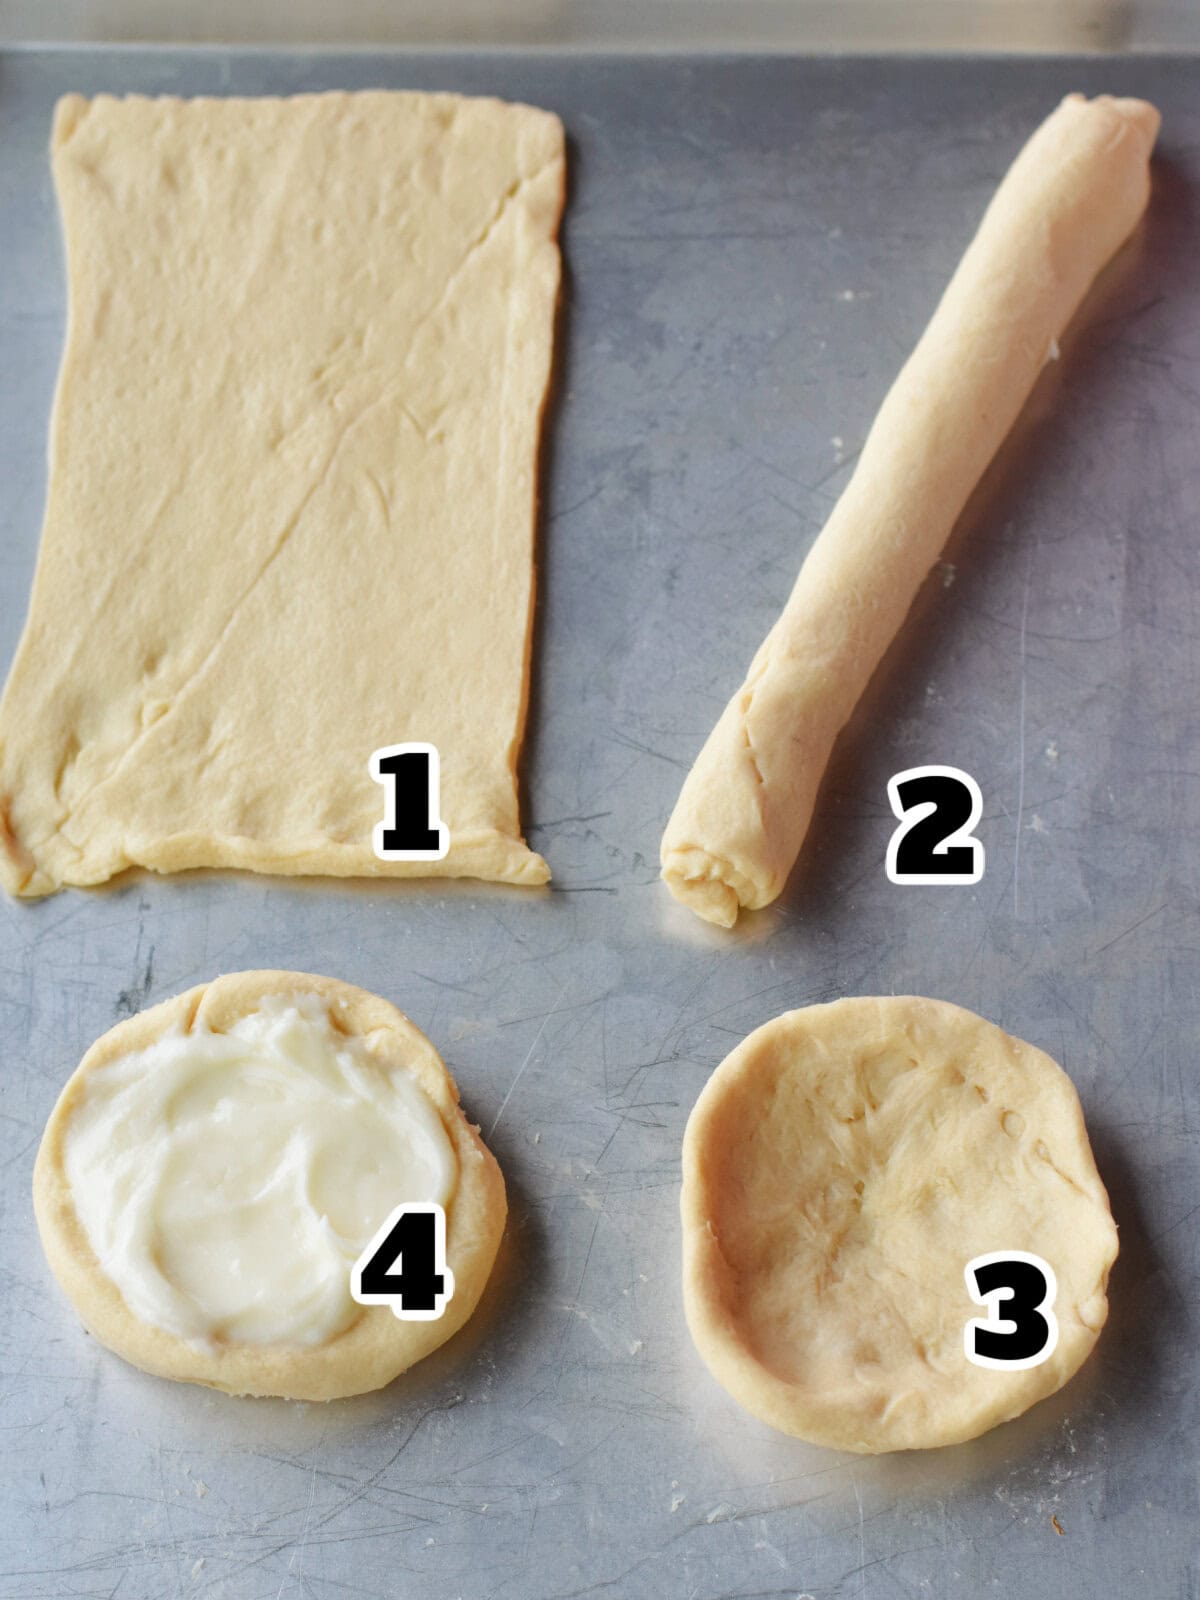
Unroll both tubes of crescent roll dough, cutting the dough into 8 separate rectangles. You can use kitchen shears or a pizza cutter to make this task easy.
Use your fingers to smooth together the perforated line across each rectangle of dough. (This will keep the filling from escaping as the pastries bake.)
Starting at the long side of each rectangle of dough, roll up each one to form a cylinder. Now, form each cylinder of dough into a circle, pinching the ends together to secure.
Save this Recipe
Using your fingers, press the circle of dough into a cup that is about 4-inch across.

Place the 8 crescent roll cups onto a greased, rimmed baking sheet, 4 on each side.
Divide the prepared cream cheese mixture between the crescent roll cups on the baking sheet, spooning it into the center of each one, then spreading it out evenly.

Bake the Danish, uncovered, on the center oven rack for 15-18 minutes or until the pastries are golden brown on the sides and bottom. *Don’t worry if the filling falls a bit in the center as the pastries cool.

Top each Danish with the desired amount of cherry pie filling. Serve while the pastries are still warm. If desired, you can drizzle the Danish with a bit of powdered sugar glaze.
To reheat the Danish later, warm for 12-15 seconds in the microwave.

Make mini danish
Instead of making 8 pastries, divide the dough into 16 portions to make 16 small cups and proceed with the recipe. Since the pastries are smaller in size, bake them for just 13-15 minutes or until golden brown.
Make danish ahead of time
You can assemble these danish 2-3 hours of time; store in the fridge, lightly covered with plastic wrap, on a baking sheet until ready to bake.
How to Freeze
These pastries to freeze well. After you’ve filled the pastry cups with the cream cheese filling, they can be frozen. Bake from frozen according to the recipe directions, then top with cherry pie filling and serve.
Keep in mind that they may need a couple of extra minutes of baking time when baking from frozen.
What can I serve with cherry cheesecake danish
We love these Breakfast Meatballs and also these easy Ham and Egg Cups. Crispy Oven-Baked Bacon is a good option (according to my family!) and if you’ve got an Instant Pot, you can whip some Pop-and-Go Egg Bites in just minutes. And, homemade Instant Pot yogurt (also made in your Instant Pot!) would be delicious served topped with this healthy granola recipe.
More Favorite Recipes to Enjoy
- This Honey Bun Cake takes a plain yellow cake mix and makes a breakfast treat your family will request again and again.
- This Cherry Pecan Banana Bread makes two big loaves of the most moist banana bread you’ll EVER find.
- These Easy Orange Breakfast Crescent Rolls are a perfect spin on Pillsbury orange Danish and can easily be made into orange cinnamon rolls.

Cherry Cheesecake Danish
Save this Recipe
Ingredients
- 2 tubes crescent roll dough, 8 count each I like Pillsbury brand
- 6 ounces cream cheese, softened may use one-third less fat cream cheese, if preferred
- 1/2 cup granulated sugar
- 2 teaspoons all-purpose flour
- 1 teaspoon vanilla extract
- 20 ounce can cherry pie filling, substitute your favorite brand I prefer Duncan Hines Wilderness brand
Instructions
- Preheat oven to 350 degrees F.
- Unroll each can of crescent roll dough, cutting the dough into 8 rectangles. Kitchen shears or a pizza cutter are handy for this task.
- Use your fingers to smooth together the perforated line across the dough of each rectangle.
- Starting at the long side of each rectangle, roll the dough up into a cylinder. Now form each cylinder of dough into a circle, pinching the ends together to secure.
- Use your fingertips to press the circle of dough out into a flat cup that is about 4-inch across, creating a place for the cream cheese filling to nest inside.
- Place the 8 crescent roll cups onto a greased, rimmed baking sheet, 4 on each side.
- Meanwhile, in a medium mixing bowl, combine the softened cream cheese, sugar, flour, and vanilla, stirring until smooth.
- Divide the cream cheese mixture between the 8 prepared crescent roll cups on the baking sheet, spooning it into the center of each one, spreading it out evenly.
- Bake the Danish, uncovered, on the center oven rack for 15-18 minutes or until golden brown on the sides and the bottom of each pastry. *Don't worry if the filling falls a bit in the center of each pastry as they cool.
- Once the Danish have cooled slightly, top each one with the desired amount of cherry pie filling. (You will probably have a bit of cherry pie filling leftover.)
- Serve while the pastries are still warm. **If desired, you can drizzle the Danish with a bit of powdered sugar glaze. To reheat the Danish later, warm for 12-15 seconds in the microwave.
Nutrition
Originally published April 19, 2022. Updated November 5, 2024.

5 Stars!!!
the recipe update must have been made with love and care because not only was I able to recreate it, I was able to follow what I consider a no fail instruction list.
Thank You Chef Alli!!!
Hi Amy – I’m so glad you enjoyed this recipe and were successful with it – you’ve made my entire day!
Thank you for letting me know,
Chef Alli
I would like to make this but I am not A very good baker, they look delicious and like something I could make for my family that they would love. I’m a little confused what to do with the dough and there are no pics or video. Help please.
Hi Leanor –
Thank you for your comment here and for bringing this to my attention. I will edit this recipe and add some pictures ASAP and then let you know when the recipe has been updated. If you’re struggling, that means others are too, so I appreciate you letting me know what would help!
Chef Alli